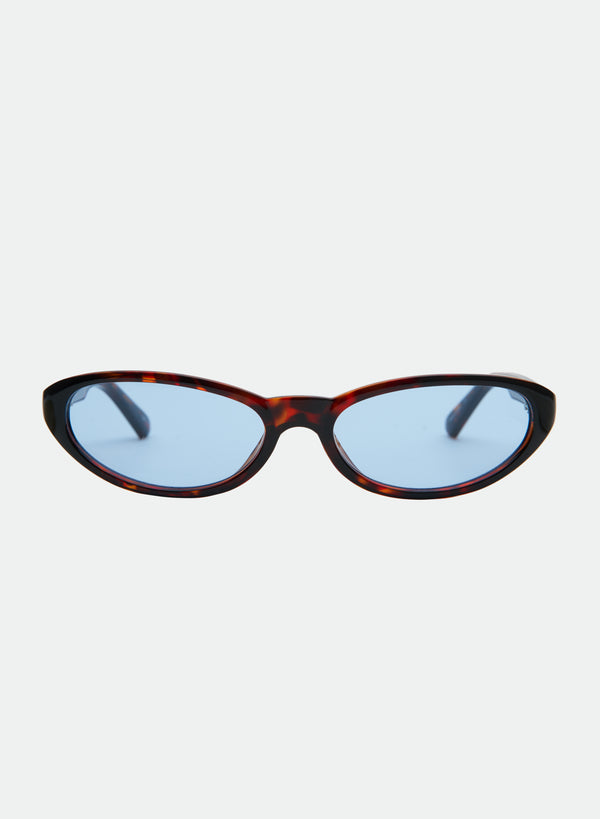
How to Measure Your Face for Glasses at Home
Updated July 2026
Great sunglasses don’t just look good—they sit comfortably, don’t slide, and don’t press on your nose or cheeks. Use this fast, accurate method to measure frame width, lens height, and bridge (nose gap) at home, then compare to the measurements listed on every OTRA Product Detail Page. You’ll see specs in millimeters first (with inches alongside) so U.S. readers can scan either way.
How do you measure your face for glasses at home?
Use a rigid millimeter ruler to capture three numbers on a pair of glasses that already fits well: frame width across the widest outer edges, lens height at the tallest point of the lens opening, and bridge (nose gap) at the narrowest point between the lenses. OTRA lists these same three specs—frame width, frame (or lens) height, and nose gap—on every Product Detail Page, so you can compare your notes directly. Stay within about ±2–3 mm of your baseline pair to keep a similar, comfortable feel.
Quick way to find your glasses size without going to a store
What you need
- Rigid millimeter ruler or tape (mm are most precise; quick conversion: 1 in = 25.4 mm).
- Flat surface with good, even light (a bright window in the morning works well).
- Your current glasses—pick the pair that already feels comfortable.
Step‑by‑step
- Clean the frame and set it face‑up with the temples closed.
- Measure frame width: place the ruler across the widest outer edges of the front. Record in mm.
- Measure lens height: measure one lens at its tallest visible opening (top to bottom of the lens area). Don’t include extra rim thickness beyond the opening.
- Measure the bridge (nose gap): measure the shortest distance between the inner lens edges at the nose cutout.
- Save your numbers in your phone and take a quick reference photo. If you’ll preview styles online, skim AI Try‑On tips: lighting, angle, and what to look for before checkout for truer previews.
On OTRA pages these appear as frame width, frame (or lens) height, and nose gap, so you can compare your notes instantly.
How do I measure frame width for sunglasses?
Frame width (overall feel)
Width predicts stability. Too narrow and the temples can pinch; too wide and frames drift. To keep a familiar feel, compare new styles within roughly ±2–3 mm of a pair you already love. If your current frame bows outward at the hinges, size up; if it leaves temple marks, size down or choose more flexible temples. For a bigger‑picture roadmap across silhouettes, see the Comfort & Fit Selection Core Guide: Confident, All‑Day Frames That Love Your Face.
Lens height (cheek contact and coverage)
Taller lenses increase shade and presence but are more likely to touch your cheeks when you smile. Shorter heights clear cheeks but reduce vertical coverage. If you often smudge makeup or feel lens‑to‑cheek contact, start with mid heights or shapes that lift at the corners—our explainer on how lens height affects cheek contact and smudging shows what to target.
Bridge (nose gap) fit
The bridge value signals how closely the frame meets your nose. Smaller gaps add contact and lift; larger gaps feel airier but can slide. If you see red marks or a low‑sitting front, dialing in bridge fit is the fastest win. Learn typical ranges and comfort fixes in Nose bridge comfort: low vs. high bridge fits and avoiding red marks.
Translate your numbers into quick comfort checks
- Stability test: with similar widths and bridge values, nod lightly—frames should stay put. Still sliding? Consider a slightly smaller bridge or grippier tips; see Troubleshooting common fit issues: slipping, pinching, and nose gap fixes.
- Cheek clearance: smile. If lenses touch, try a shorter lens height or lifted corners. For bold looks that avoid smudges, use Choosing oversized without overwhelm: proportion rules by head size.
- Temple comfort: if pressure builds behind ears, explore temple length and curve adjustments in Temple length and behind‑ear comfort for long wear and these easy fit tweaks you can do at home.
Quick decision helpers (with real, measured examples)
Below are common use cases with silhouettes that often line up with the measurements and comfort goals noted. Open the page, check width/height/nose gap, then decide.
- Clean, everyday rectangle: If your baseline width matches and you like straight temples for stability, the sharp lines of Kenny - Black/ Smoke deliver a modern, go‑anywhere look.
- Same geometry, new mood: Want a color refresh while keeping similar dimensions? Try the cooler vibe of Kenny - Tort/ Blue.
- Lightweight, low‑pressure feel: If bridge pressure builds over long hours, thin metal and minimalist builds distribute weight well—see the airy profile of Sady - Trans Gold/ Brown.
- Soft‑square ease: Gentle angles can reduce cheek contact for many face shapes; compare proportions on Nia - Darkchocolate.
- Subtle front curve to spread pressure: A lightly wrapped front can improve stay‑put stability and comfort; explore Derby - Trans Chocolate/ Light Grey, then read when a gentle wrap improves stability and coverage.
- Winged lift for cheek clearance: Lifted outer corners raise weight off the cheeks; try the confident upsweep of Papillon - Black/ Smoke.
- Bold color pop: When the numbers match but you want a fresh mood, lens color can reset the vibe—peek at Maddy - Black/ Green.
- Low‑key classic: Prefer a slim, narrow profile for small to average widths? The streamlined build of Drew - Black is an easy reference.
- Slim, chic cat‑eye for narrower widths: If your notes show a slightly narrower width and you still want lift, compare the compact feel of Zoya - Black/ Smoke.
- Same cat‑eye lift, warmer palette: Love your fit but want a softer neutral? Consider Nove - Coffee for a transparent brown tone without changing fit too much.
Proportion, styling, and try‑on tips
Your numbers get you close; a quick try‑on seals it. For accurate virtual sizing and angles, start with AI Try‑On tips. If you love bold fronts, balance them with hair volume, earrings, and makeup intensity using Balancing statement frames with hairstyle and accessories. For shape ideas by features, see Face shapes decoded: rectangles, cat‑eyes, and aviators that flatter. Long days under U.S. summer sun? Prioritize lighter builds in Lightweight all‑day picks and heat‑wise choices in Seasonal comfort: heat, sweat, and frame materials in summer.
Your numbers—what to try next
Use this compact matrix to turn measurements into next steps.
| What you measured or feel | What to adjust first | Why it helps | Tradeoff to consider |
|---|---|---|---|
| Frames slide down during the day | Smaller bridge by ~1–2 mm | Increases nose contact and lift | May feel snug; choose lighter materials if pressure appears |
| Temples press behind ears | Wider frame by ~2–3 mm or adjust temple curve | Relieves side pressure | Extra width can look larger on narrower faces |
| Lenses touch cheeks when you smile | Reduce lens height by ~2–4 mm or choose lifted corners | Creates cheek clearance | Less vertical coverage; consider darker lenses for shade |
| Front feels visually small but fits fine | Keep width, choose thicker rims or bolder color | Adds presence without changing fit | Heavier look; balance with hair and accessories |
| Need more sun coverage without bulk | Slightly taller lens height + lighter materials | Boosts shade while staying comfy | Taller heights still need balanced bridge and width |
For hands‑on adjustment ideas, start with fit tweaks you can do at home. If you’re troubleshooting a specific issue, the focused guide on slipping, pinching, and nose gap fixes can save time.
U.S. sizing notes: quick mm ↔ in tips
- Write sizes in mm first for easy comparison; add inches if you prefer (1 in = 25.4 mm).
- Stay within ±2–3 mm of a favorite pair to keep a similar feel; go wider for a roomier, oversized mood, narrower for a snugger feel.
- Check all three numbers together: width for span, height for cheek clearance, bridge for stability.
FAQ
- Do I need an exact match to my measurements? No. Aim within about ±2–3 mm for a similar feel. If you want an intentionally oversized vibe, increase width or lens height while keeping the bridge close to your baseline.
- Is frame height the same as lens height? Some pages list total frame height; others list lens height. Both describe vertical coverage. Compare like‑to‑like when possible and use the guide on lens height vs. cheek contact for context.
- I have a low bridge—what matters most first? Start with the bridge number, then refine width and height. For targets and comfort tips, see Nose bridge comfort.
- Where can I learn beyond measurements? For shapes, proportions, and materials, bookmark the Comfort & Fit Selection Core Guide.
- How do I measure bridge size for sunglasses at home? Measure the shortest distance between the inner edges of the lenses at the nose cutout using a millimeter ruler—that’s your bridge (nose gap). Compare it to the nose gap listed on the OTRA Product Detail Page, and if you see red marks or a low‑sitting front, start by adjusting this number first.
Next steps
Take your three measurements, compare them to the specs on styles you love, and do a quick mirror or AI try‑on. If you’re between sizes, use the matrix above to fine‑tune bridge and height first, then width. When you’re ready to browse, start with a silhouette that matches your vibe—rectangular and clean, lifted cat‑eye, or soft‑square—and keep your measurements handy.